
Rope baskets are incredibly versatile and beautiful as well, having a certain charm that’s rather difficult to describe in words but very easy to observe with the naked eye.

Also, in case you didn’t know, rope baskets can be handcrafted and are actually quite easy to make. If you’d like to give it a try we have the perfect project in mind: a small basket that can be used to store jewelry and other small and precious items. This is how you can craft one for yourself:


hot glue gunscissorspaintbrushpencilpink acrylic painttinropesilk ribbonlace ribboncardboard
Place the cardboard flat on your work surface, then place the tin on top face down. Trace around the tin with a pencil to create an outline. Then use the scissors to cut out the circle. This will later be used to make a lid for the basket.


Before you proceed to the next step, make sure the tin you decide to use for this project is nice and clean. You should remove any labels or glue if necessary and make sure the edges are smooth and don’t have visible imperfections. Then apply a thin line of glue onto the tin starting from the bottom and start wrapping the rope around it, adding more glue as you go. Make sure the rope is nice and tight and follow the edge in a straight line.


When you’re done covering the exterior of the tin with rope, cut off the excess and secure the end with hot glue, making sure it blend nicely with the rest of the rope and doesn’t look out of place. You can flatten it and press it down as the glue dries and you can also cut it at an angle to make the transition smoother.


The next step is to prepare a little loop handle for the lid of your rope basket. Cut out a piece of sink ribbon double as long as you want the loop to be, then cut a piece of lace ribbon the same size and glue the lace on top of the ribbon. Apply a thin line of hot glue and try to center the lace onto the ribbon. Gently press it with your fingers and allow it to dry.


Take the piece of ribbon you’re prepared, gently fold it in half and spread the ends with your fingers, centering the ribbon onto the circular piece of cardboard you’re cut out previously. Make sure the loop is positioned at the center. Glue the ends flat onto the cardboard to secure the handle.


Starting from the center where the loop handle is, apply a bit of hot glue onto the cardboard and start making a rope coil. Add more glue and secure the rope onto the cardboard lid until you’ve covered the entire circle. Make sure you also wrap the rope around the edge of the cardboard at the end. Then cut off the excess rope. You will no longer need it for this project.


Now it’s time to add the finishing touches to your rope basket. This step is optional and you can leave the basket as it is if you prefer a simple design. We chose pink acrylic paint that matches the little loop handle on the lid. Take the paintbrush and start painting a simple pattern onto the basket. It can be anything you want and you can get really creative here.


Once the paint is dry, your rope basket is complete. Enjoy!


Gisele Bundchen's contemporary twist on this emerging design trend is the talking point of her kitchen
Zendaya taps into the subtle power of this accessory to ensure her neutral living room is never boring
Amazon has become a go-to for chic home decor – here’s what we’re shopping from the 2024 Spring Sale
This designer's 'every seat needs a surface' rule has changed my living room layout forever – here's what I mean
5 designer Amazon storefronts that make shopping for stylish homeware so much easier
Joanna Gaines' 'mesmerizing' garden is the perfect example of how to grow cut spring flowers at home
Tan France opts for this stabilizing color palette to 'ground' his guest cottage, experts say
Shark's St Patrick's Day sale is here - and you can save $100s on vacuums and air purifiers
Matthew and Camila McConaughey's raw cabinets possess a texture and warmth that's replicable in our kitchens
How To Make An Easy Wall Hanging With Yarn Tassels
How To Cut A Mirror And Turn It Into A Gem Statement
DIY Stone Driveway Project
Woodworking For Beginners: How To Make A Rustic Hanging Planter
Fast and Fun: DIY Bookends to Make You Smile
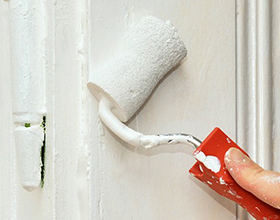
Which Masking Tape Is Best for DIY Home Painting?
Simple Heart-Shaped Nail String Art Perfect For Beginner DIYers
Concrete Fence Posts: The Two Methods Installation
How To Efficiently Organize Your Pantry Using Shelving Systems
DIY Outdoor Kitchen Countertop Options
 zpostcode
  Recruit
  weather
  mreligion
  Yellowpages
  sport
sport  constellation
  shopping
  name
name  game
game  directory
  literature
  Word
Word  tour
tour  furnish
  Lottery
  tftnews
  lyrics
  News
News  digital
  car
car  dir
dir  Edu
Edu  Finance