Decorating for fall can be a lot of fun. The warm days of summer are gone and it’s time to get cozy and ready for the change of seasons.

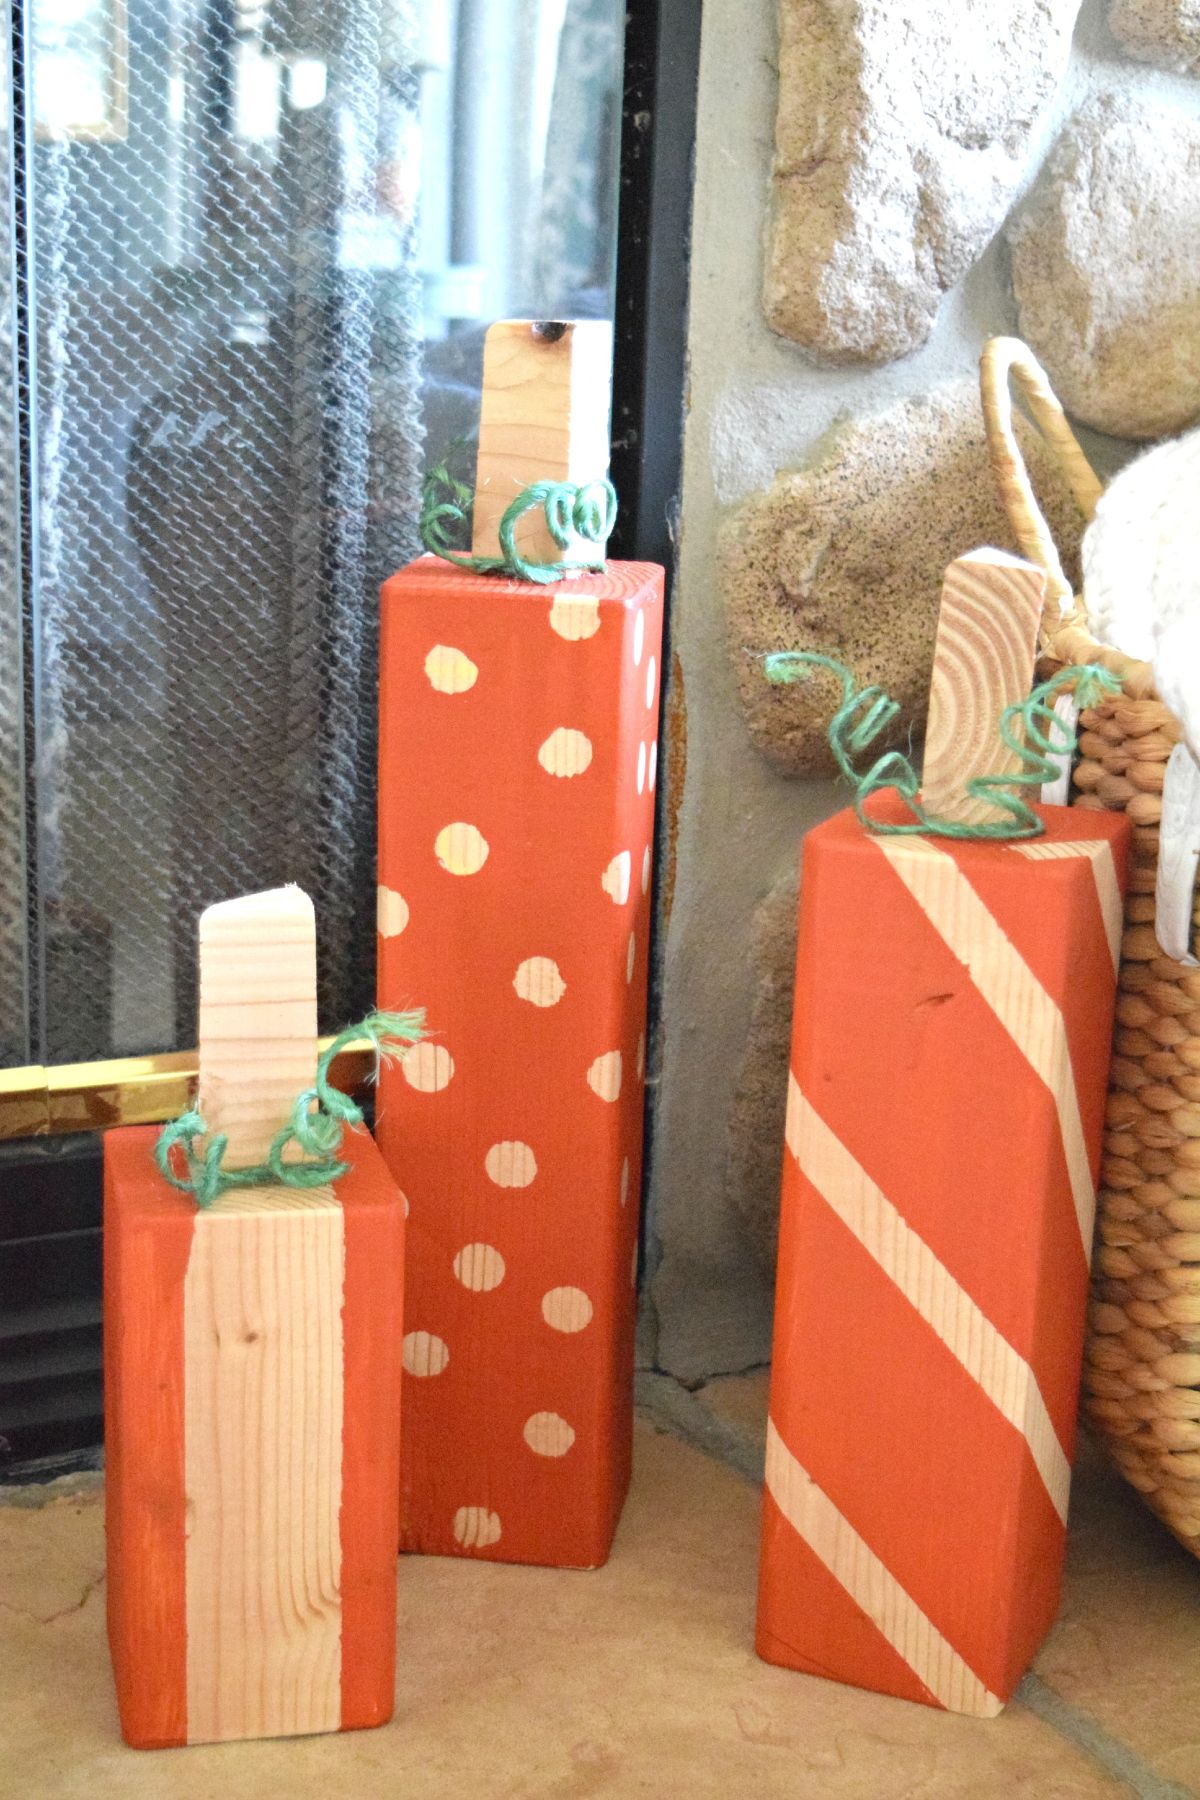
Making creative and unique fall projects is an enjoyable way to decorate your home. I created these square pumpkins, which are a funky and different option for fall.

One 4×4Orange paintPaintbrushPainter’s tapeRound stickersGreen twine or ropeScrap woodHot glueSandpaper
You don’t need a large number of supplies to create these whimsical pumpkins. Take your 4×4 and cut it down to the desired height of your pumpkins. I cut mine in three sizes: one 12-inch, one 10-inch and one 8-inch. I like the idea of staggered sizes because they provide more visual interest.

Once I had my three pieces cut, I sanded down the edges just enough to slightly round the corners.

I applied the round dot stickers to one wood piece, applying them randomly all around the pumpkin. When adding polka dots to something, you want a fun and full look, but no lines or patterns.

I made two different line patterns on the other two pieces of wood using painter’s tape. The key to using painter’s tape is to firmly smooth the tape onto the surface. If you don’t, any part of the tape that is raised will allow paint to seep in and the edge of the line will not be straight.

Once all three pieces were decorated the way I wanted, it was time to paint! I chose a bright orange color. Make sure that you paint up and down, going with the grain of the wood. I only needed to do one coat.

Let your pumpkins sit until they are completely dry and then make any necessary touch-ups.

When the pumpkin squares are dry, peel off all the stickers and painter’s tape — what you’ll have left is a fun pattern on each pumpkin.

I liked them as they were, but I also wanted to make them appear more pumpkin-like. Using some scrap wood pieces and a hot glue gun, I attached a scrap to the top of each pumpkin to serve as a stem.

To enhance the whimsical feel of the pumpkins, I took some green twine and tied it around the stem. Then, twisted the twine around my fingers to create a curl, making it look like the vine that pumpkins grow on.

Once I added these small details they were done!


In just a few steps, I was able to create some unique and fun square pumpkins for my home. Using bold patterns helps these seasonal accessories feel modern and updated. When it comes to fall decor, have fun with it! The bright and bold pieces work very well with all the natural colors of autumn, bringing a little bit of the outdoors to the inside of your home.

Gisele Bundchen's contemporary twist on this emerging design trend is the talking point of her kitchen
Zendaya taps into the subtle power of this accessory to ensure her neutral living room is never boring
Amazon has become a go-to for chic home decor – here’s what we’re shopping from the 2024 Spring Sale
This designer's 'every seat needs a surface' rule has changed my living room layout forever – here's what I mean
5 designer Amazon storefronts that make shopping for stylish homeware so much easier
Joanna Gaines' 'mesmerizing' garden is the perfect example of how to grow cut spring flowers at home
Tan France opts for this stabilizing color palette to 'ground' his guest cottage, experts say
Shark's St Patrick's Day sale is here - and you can save $100s on vacuums and air purifiers
Matthew and Camila McConaughey's raw cabinets possess a texture and warmth that's replicable in our kitchens
The Cutest DIY Christmas Ornaments Only Require Three Ingredients
No Vacuum? 5 Hacks to Clean Your Carpet
No Shovel? No Problem. Five Ways to Remove Snow from Your Driveway
The Secret to a Long-Lasting Healthy Christmas Tree
How to Make Homemade Wood Filler
These 5 Hacks will Have You Wrapping Christmas Gifts Like a Pro
This Simple Trick Will Keep Your Pipes From Freezing this Winter
Can You Leave a Gas Grill Outside During the Winter?
How to Reupholster a Chair From Start to Finish
TikTok Explains the Viral Shower Rod Hack for Hanging Garland